Welcome, esteemed photographers and visual storytellers! Today, we embark on an enlightening journey through the dynamic and sometimes challenging world of indoor photography lighting. Lighting can make or break a photograph, and when you're working within the confines of an indoor space, it's imperative to understand and manipulate light to suit your creative vision. So let's shed some light on this topic and help you master the art of indoor illumination.
The Foundation of Indoor Photography Lighting
Harnessing Natural Light to Your Advantage
One of the most pleasing sources of light for indoor photography is natural light, which emanates from the sun and enters through windows, doorways, and other openings. It's important to recognize the quality of natural light during different times of day to use it effectively.
Morning Light: Offers a soft quality that brings a calm and serene mood to your images.
Midday Light: Can be harsh and direct, but when diffused, it provides a balanced lighting environment.
Afternoon Light: Produces a warm glow that can add emotion and depth to your photographs.
Overcast Daylight: Acts as a natural diffuser, creating even and soft lighting conditions.

Mastering the Use of Artificial Lighting
While natural light is desirable, relying on it alone isn’t always feasible. Artificial lighting sources give you control over the intensity, direction, and color temperature of the light.
On-Camera Flash: While direct flash can be harsh, bouncing the flash off walls or ceilings can provide a much softer effect.
Off-Camera Flash: Allows for greater control by positioning multiple flashes around your subject or scene.
Continuous Lights: LED panels, softboxes, and ring lights provide a constant source of light, ideal for seeing the effect in real-time, especially useful for video content.
Techniques for Shaping and Modifying Indoor Photography Lighting
Bouncing and Reflecting Light to Enhance Your Images
Bouncing light involves redirecting your main light source off a ceiling or wall to soften it and reduce harsh shadows. Reflectors are incredibly versatile tools for sculpting light and filling in unwanted shadows, neutralizing overly contrasty scenes by reflecting light back onto your subject.
Diffusion – The Key to Softening Harsh Lighting
Diffusers come in many forms, from professional softboxes to improvised solutions like thin white fabrics or frosted shower curtains. By placing a diffuser between your light source and the subject, you soften the light, which can flatter your subject and create a more inviting atmosphere.
Practical Indoor Photography Lighting Setups
Now, let’s put theory into practice with a few fundamental lighting setups that can drastically improve your indoor photographs.
The Classic Three-Point Lighting
A timeless technique used for portraits, interviews, and more, three-point lighting consists of:
Key Light: The primary source of light, typically positioned at a 45-degree angle to the subject.
Fill Light: Used to reduce the contrast created by the key light, often placed on the opposite side of the key light at a lower intensity.
Back Light: Also known as a hair light or rim light, provides separation between the subject and the background by highlighting the subject's edges.
The Moody One-Light Setup
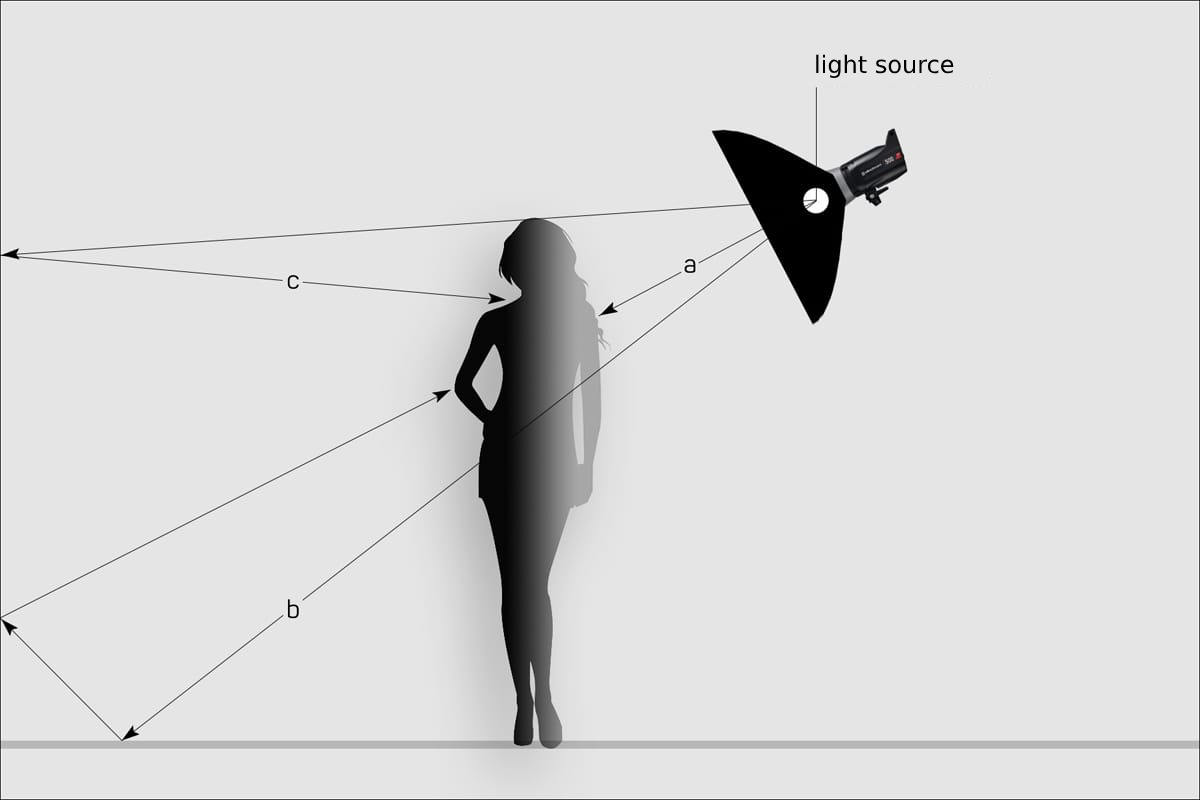
For a dramatic look, using a single light source can cast deep shadows and highlight textures. Position it to the side or above the subject to create a chiaroscuro effect, embracing the shadows as much as the light.
Addressing Common Challenges in Indoor Photography Lighting
Mixed Lighting Conditions and Color Balancing
One of the trickiest aspects of indoor photography is dealing with mixed lighting, where different types of light sources are present, each with varying color temperatures. To overcome this:
Use gels on your flash to balance the color temperature with ambient light.
Set a custom white balance in-camera for color accuracy.
Shoot in RAW format to have more flexibility in adjusting color balance during post-processing.

Working With Limited Space and Resources
Not everyone has access to a spacious studio or a plethora of professional lighting gear, but creativity often thrives within constraints.
Use mirrors or shiny surfaces to direct light where needed.
Experiment with DIY diffusion materials to soften harsh lights.
Embrace shadows and use them creatively to add mood and depth to your photographs.
Conclusion
In the realm of indoor photography, lighting is not just about visibility; it's about mood, texture, atmosphere, and the story you want to tell. By understanding and manipulating light effectively, you can transform any indoor space into a canvas for your photographic artistry. Experiment, adapt, and above all, let your creativity flourish under the glow of your perfectly crafted lighting.
Whether you’re capturing the nuances of a still life, the candid moments of lifestyle photography, or the expressive details of portraiture, remember that each adjustment to your lighting setup is a step towards the ultimate expression of your vision. Keep exploring, keep learning, and let the light guide you to your next photographic masterpiece. Happy shooting!